
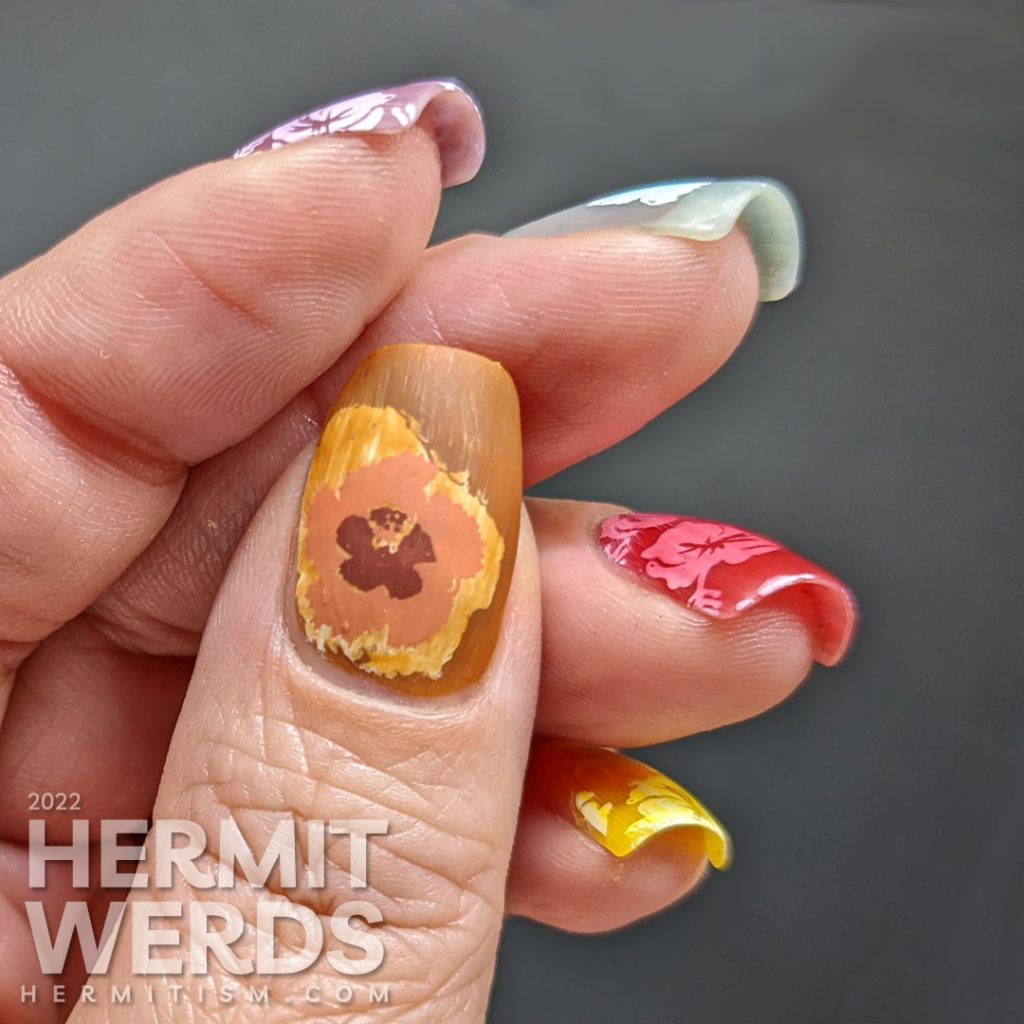
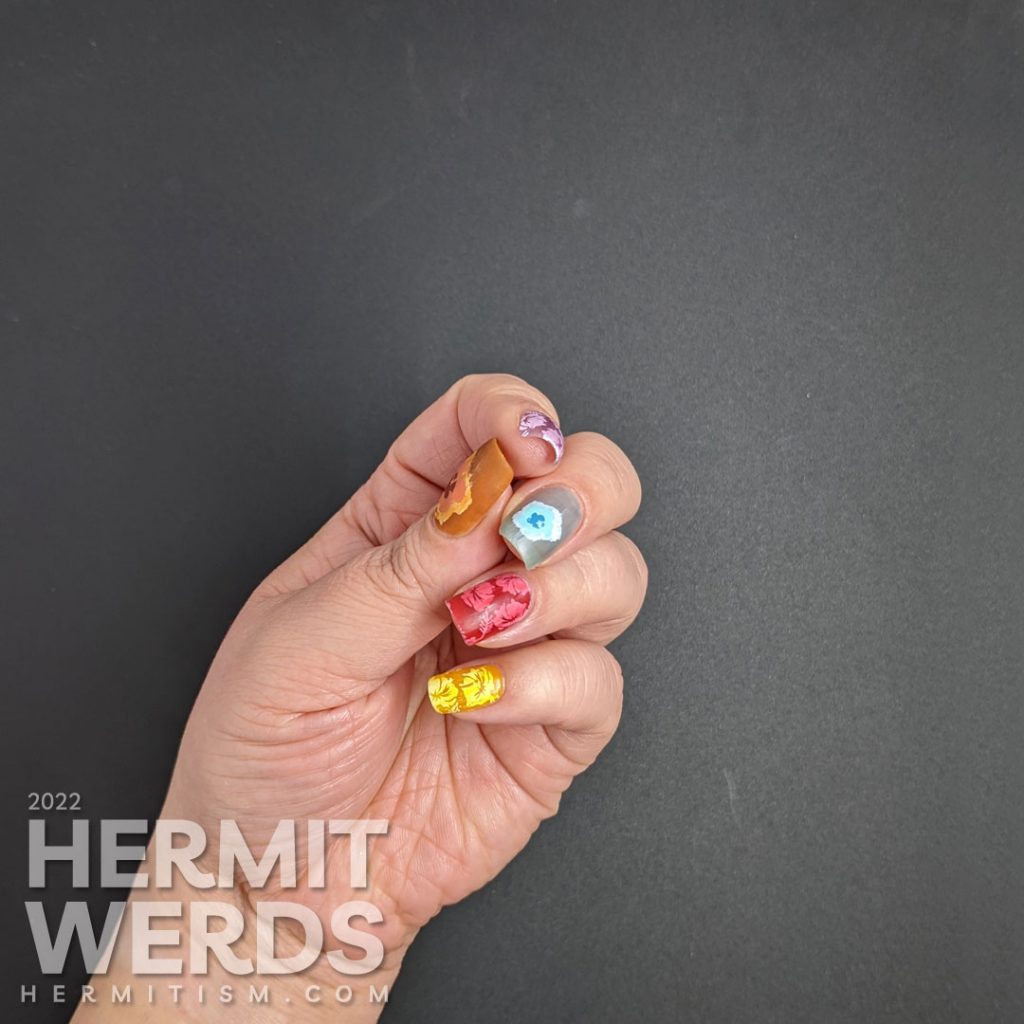
This isn’t an official review. Born Pretty did not send me these polishes for review. But I bought four of them during the Singles Day sale and I thought I’d use them together in a quick (and sloppy) mani to see how they worked. So this is very rainbow and then I used hibiscus flowers in my pond so I’ve gone completely season-inappropriate. Tropical rainbow skittle for the win.
So here’s the mani, you can see how the white stamping polish is incredibly streaky. My bad. I should have used a smudge free clear coat before adding another layer of jelly. Still…eh? I was in a hurry and I’m just trying to get back into painting at all. It’s fine. Ignore the yellow, that’s an old OPI polish…

Reviewing Born Pretty jelly polishes
Here we go with the colors I am semi-reviewing today. I was really excited about these jellies because the blue, purple, and orange were all slightly desaturated shades which I tend to look better in. The red also leans a more towards tomato red, which is also a better shade of red for me. I was most excited for the orange and, as you can see, it’s not even close to matching the product photos. I’m probably going to destash it.
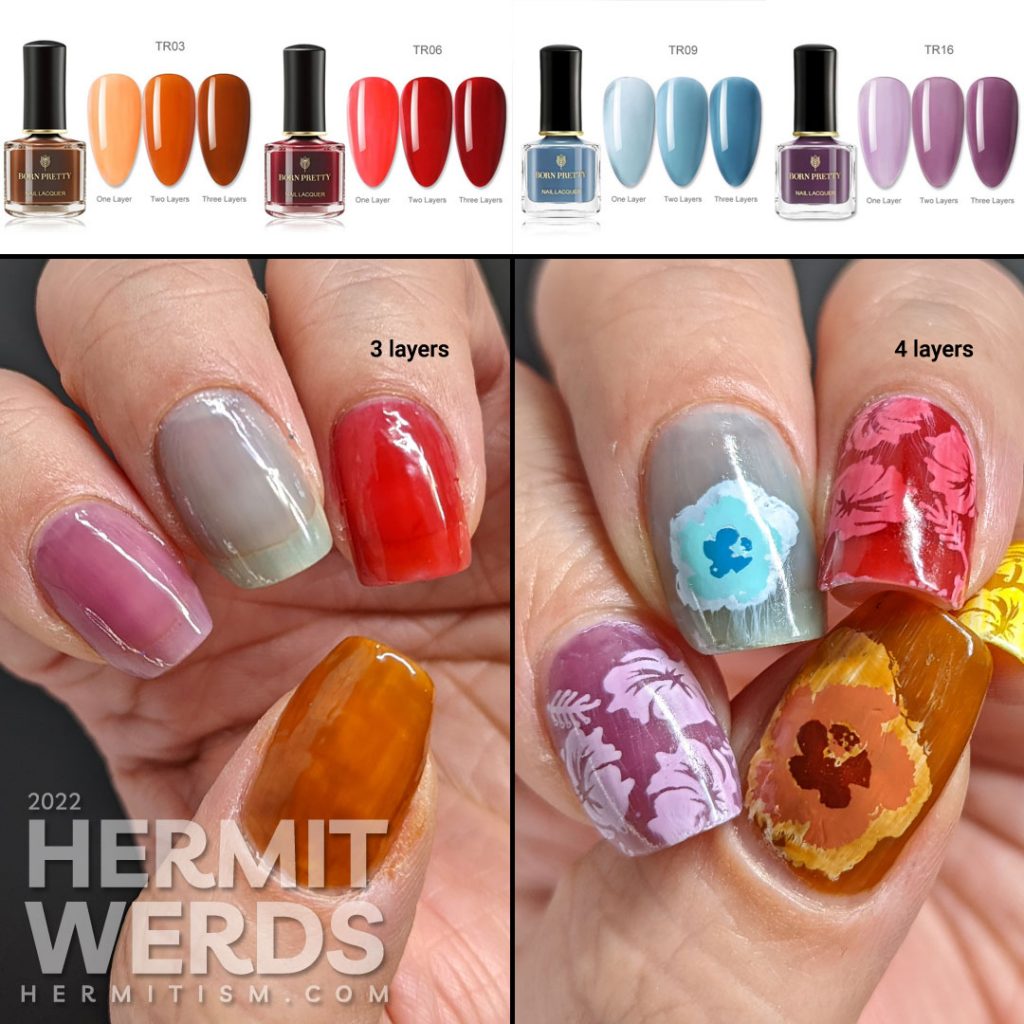
So how did they perform? As jelly polishes they dried quickly and semi-matte. The quick drying means you have to paint really fast. I would recommend against using them on super long nails for that reason. They were a little bit streaky with the orange appearing to be the worst, but it was also on my bumpiest and biggest nail so maybe it’s not…the worst? It’s just…not orange. 😭
Jelly polishes are supposed to be translucent, but the blue is ridiculously so. None of them reached the darkest shade shown in the product photos. The red and purple came closest to being what I thought they would be and I’m excited to use them again. The blue I ended up loving (even though it’s so light it’s barely there) because it kind of reminds me of sea glass. All in all, not a bad purchase considering how cheap Born Pretty polishes are.
Here are my swatch sticks. I paint four layers on them with the part closest to the stick having one layer and the tips with four. I like painting my swatches this way since it gives me a good indication of how streaky a polish is and what to expect the more of it I put on my nails (sometimes you want that lighter one or two layers for your look 😉).

Nail art products used
- Base Polishes:
- Born Pretty’s BP-TR03” (orange)(destashing), “BP-TR06” (red), “BP-TR09” (blue), “BP-TR16“; and OPI’s “Primarily Yellow“
- Stamping Polishes:
- Born Pretty’s “Sunrise” (press sample), Hit the Bottle’s “Sweeten the Teal“, KADS’ “34 Salmon“, Maniology’s “Frosty“, and UberChic’s “Essential White“
- Stamping Plates:
- Clear Jelly Stamper “CjS-38“ (layered hibiscus flowers) and “ZJoy 08” (tropical hibiscus pattern)
This sloppy manicure was brought to you by a surprising number of other polishes because I did some rainbow layered stamping on two of my nails instead of a pond. Fun!
Well, hopefully this mani has either helped you make decisions on Born Pretty jellies or made your winter feel a little more bright (for the Northern Earthers). Until next time, friends! 🙋♀️
They look good. I don’t own too many jelly polishes!
Thanks! I think compared to how many other polishes I own, I don’t either. But only in that context. 😆